


I made enough big Gary approximately 40cm, below is a copy of a small version of the pattern that I created gary. You may use it to make gary for personal use or sell the doll, but do not sell my patterns. Only one pattern that does not enter the picture side of the shell outskirts ... because I think it's easy to make your own as a rectangular shape with a length = circumference of the shell of gary curved (with a cloth tape measure) and width = shell thickness desired. Because I made a size 40cm long then my original patterns gary basic body is 40cm too. You can enlarge or reduce the pattern as needed.
Note: you can sell your work based on this pattern, but please do not sell the patterns I've created, to share the pattern please include a link to this blog :)

Materials used:
light green fleece fabric, I use fleece with foam lining and Nylex fabric peach and light blue. and a bit of fleece fabric or felt with the appropriate color for Gary's eyes. Of course you do not have to use the same material, you can replace with any material according to your taste ... certainly unique instead it ..... do not forget to stuffing material ... here I use silicone fiber for good quality making it more tender when hug and more springy

Cut the fabric was appropriate pattern, if the pattern is written 1x, meaning you can just cut a piece of it. if written 2x then cut 2 pieces of fabric opposite a good side. If you want to decorate with embroidered shells gary (I use manual embroidery not computer) then do it before the fabric is cut to form the shell. other than in the embroidery of course many ways to decorate shells gary, for example with felt fabric applications, or even painted, all depends on your taste.

Then we started to prepare the sewing machine ...!
Attach the upper part of the body that gary light blue upper body to the green light with the help of a pin, and sew the bumpy side. done on both pieces of the body.


Stack the fabric facing either side of the upper body gary

Sewing on the side of the curve (not bumpy side) and leaving holes to fill later in the middle

Combine the base body or lower body to the upper gary've sewn before, with the help of a pin, position the pieces of to the right side of the bumpy.


Sewing around the body on the side of the bumpy

Turn over through the hole stuffing

After is reversed look like this.

Sew around the sides of the body gary, so that when filled in later dolls are not overly rounded body like bolsters, but the base a bit flat, like a cartoon character.

Let sewing the shell .... prepare one side of the shell and combine it with top side of the shell that you created earlier on the curved side and sewing.

Attach the other side of the shell and sewing, so the bag shaped shell

Behind and ready in stacking and filled. and do not forget to also sew gary antenna that is shaped like a pipe with one side of the dead end.

It is part of the body that is ready to be filled gary minus the eye, because it will be made later. After this step we are taking full hand stitching ... so store your sewing machine.

Fill in all parts of the body with enough silicon fiber, including shells and antennae
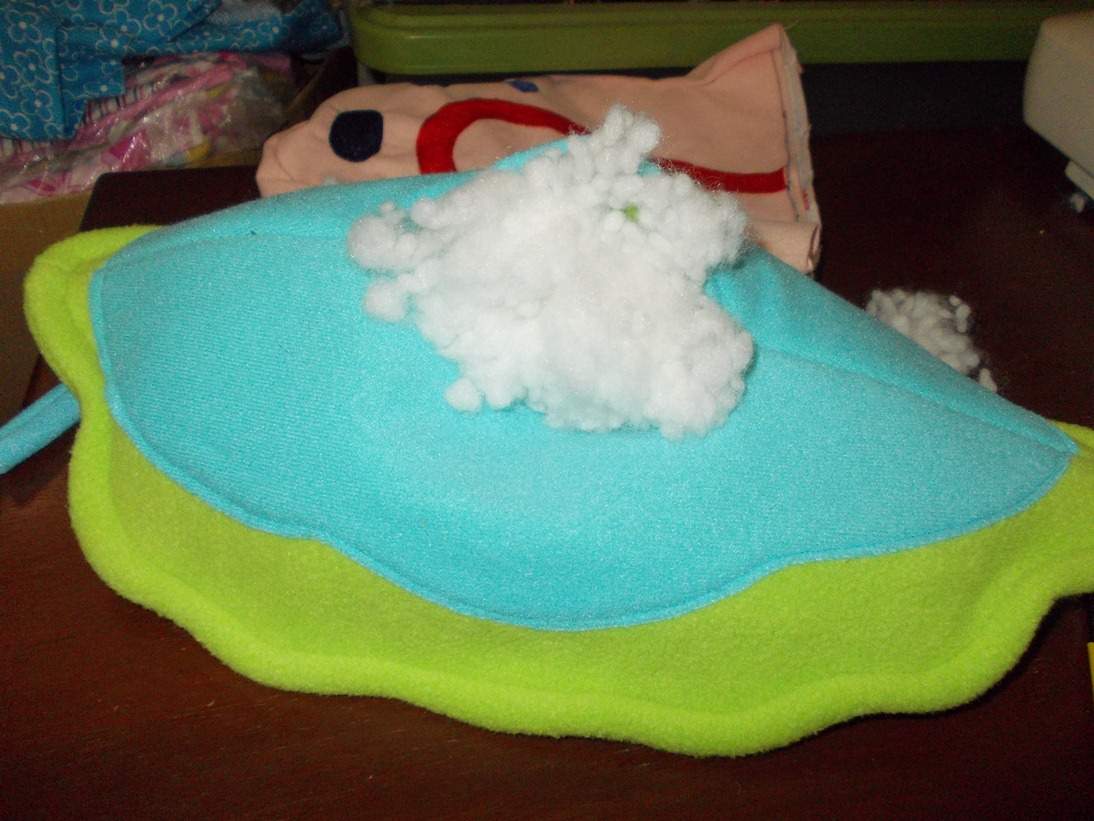
Sew the stuffing hole gary body with ladder stitch. Do not worry if the stitching are not neat because it will be closed shell: D

Put the filled shells into the silicon fiber body gary, with the help of a pin under the shells around so neat and fitting position.

Sew around the bottom of the shell with neat stitching ladder

While still left over a little hole, stuffing shell trim to desired shape, continue until all neatly sewn around the shell.

Make eye with side sewing circle and shaved baste while filling eyes shut until the desired shape and strong connective thread.

Attach the two antennas on the agency premises gary stitching, closed the ends of each antenna with shaved baste


Sew the top end of the antenna to the front of the shell as in the picture below

Sewing eyeball covering the antenna end and sewing it into the shell.


Sewing circle eyes made of pieces of fleece fabric or felt ... sewing by hand around it neatly.


Tadaaa ... Gary the snail ready to accompany your beloved son sleep

5 comments:
This is so well done! I've pinned to my Plushie Pin Board and shared on my facebook page! It would be perfect for our Fluff Project at Hopeful Threads! Thanks for sharing. :)
thanks for visiting my blog
Hello, Would you sell and ship this?
Hello Kris
I've made a free tutorial, you can try making it yourself would be cheaper. Because if I make it for you, postage would very expensive because I was in Indonesia :), thanks for stopping by to my blog
this Gary the Snail plushie is awesome! I so love it I featured it in my blog: http://www.plushiepatterns.com/make-snail-softie/ thank you so much for sharing! love it love it! hope, next time you do Sponge Bob and Patrick!:)
Post a Comment